
Este incrível lanche de alta proteína leva minutos para fazer uma fritadeira –
Chickpeas are having a serious moment — at least in my kitchen. To me, they’re kind of like french fries: No matter how you cook them, they always turn out delicious. But after plenty of trial and error, I’ve found that one appliance stands above the rest. Yep, you guessed it: my trusty air fryer. With just a few minutes of cooking, the air fryer transforms chickpeas into crispy, flavorful bites, locking in seasonings for the perfect crunch. But here’s the secret: There’s one crucial step you need to take before cooking to get them extra crispy. Follow this tip, and you’ll never go back to soggy chickpeas again. Best of all, a can of chickpeas can be had for less than a dollar. That, along with a drizzle of olive oil and some spices is all you need for this fast, protein-packed snack. In preparation of cooking these up, you’ll need to drain and rinse the chickpeas, but the next step is arguably the most important. To make the chickpeas crispy and crunchy, you’ll want to make sure they are as dry as possible before tossing them in the olive oil and spices, and I’ve found the easiest way to do it. I was recently gifted this small OXO salad spinner and it has quickly become a kitchen staple. After you thoroughly rinse your chickpeas, pop them in a salad spinner and give them a good spin until they look as close to bone dry as possible. Then you can peek at the water that accumulated at the bottom of the spinner, which is my personal favorite part of the process. Once you’ve spun the chickpeas a few times, they’re ready to be prepared and cooked.
- Chickpeas são muito utilizados em minha cozinha
- O air fryer é o melhor eletrodoméstico para cozinhar os grão-de-bico
- É necessário secar muito bem os grão-de-bico antes de fritar
Here’s everything you’ll need.
Step 1: Drain and rinse the chickpeas, then use a salad spinner as described above to dry them.
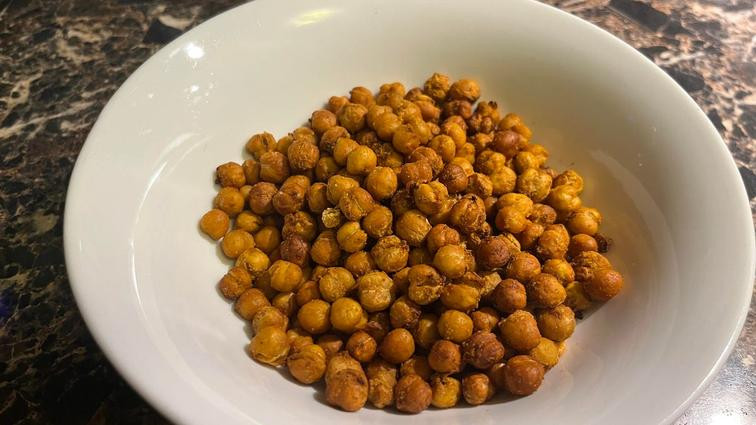
Step 2: Place the dried chickpeas in a medium-sized bowl and toss them with olive oil, then your spices, until they’re fully coated and have a slightly red tint. You can use any variation of spices that you like, but you will want to ensure your chickpeas are fully coated before cooking them.
Step 3: Place the prepared chickpeas in a parchment-lined air fryer in a single layer. Placing the chickpeas in the air fryer in a single layer ensures that they will become evenly crispy.
Step 4: Cook them at 400 degrees Fahrenheit for 10 minutes or until they are golden brown, shaking the air fryer basket halfway through the cooking time. After 10 minutes, check to ensure they are your desired crispiness. If you want them crispier, place them back in the air fryer for another 2 minutes at a time. Your chickpeas should have a nice crunch to them when they are done cooking.
Step 5: When the chickpeas are done cooking, serve them by themselves as a snack, on a salad or with a roasted vegetable on the side. I used this batch of air fryer chickpeas as a topper for a kale salad. The chickpeas added just the right amount of crunch.